How to connect sony headphones to laptop?

Are you wondering how to connect Sony headphones to your laptop?

Whether you’re trying to enjoy your favorite music, participate in virtual meetings, or watch a movie, connecting your headphones should be a breeze. But do you know the steps to do it effortlessly?

In just a few simple steps, you can connect your Sony headphones to your laptop. Most Sony headphones support Bluetooth, making it easy to pair them wirelessly.

Alternatively, you can use a wired connection if Bluetooth isn’t an option.

Stay with us as we delve into the step-by-step guide on connecting your Sony headphones to your laptop, ensuring you have a seamless audio experience. Ready to make the connection? Let’s get started!

Here are headphones better than earbuds.

How do I connect my Sony wireless headphones to my laptop?
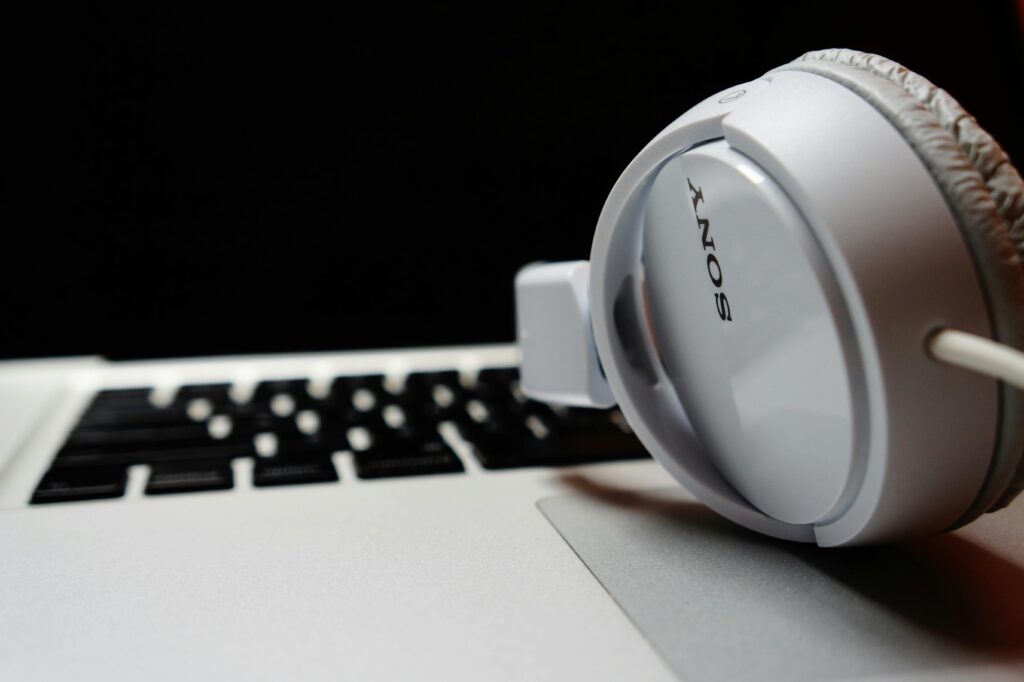
How to connect sony headphones to laptop?

To connect your Sony WH-1000XM4 headphones to your laptop, follow these steps:

  1. Turn on Bluetooth on Your Laptop:
    • On Windows: Go to Settings > Devices > Bluetooth & other devices, and enable Bluetooth.
    • On macOS: Go to System Preferences > Bluetooth, and turn it on.
  2. Activate Pairing Mode on Your Headphones:
    • Ensure the headphones are charged.
    • Press and hold the power button on your WH-1000XM4 for about 7 seconds until you hear “Bluetooth pairing” and the indicator flashes blue.
  3. Pair the Headphones with Your Laptop:
    • On Windows: Click “Add Bluetooth or other device” and select “Bluetooth.” Choose “WH-1000XM4” from the list.
    • On macOS: In Bluetooth settings, find and select “WH-1000XM4” from the list of available devices.
  4. Complete the Pairing Process:
    • Follow any additional prompts to finish pairing.
    • Once connected, your headphones should be ready to use.

Refer to the user manual if you encounter any issues.

How do I connect my Sony WH-1000XM4 to my laptop?

To connect your Sony WH-1000XM4 headphones to your laptop, follow these steps:

Here, are headphones better than earbuds.

  1. Turn on Bluetooth on Your Laptop:
    • On Windows: Go to Settings > Devices > Bluetooth & other devices, and enable Bluetooth.
    • On macOS: Go to System Preferences > Bluetooth, and turn it on.
  2. Activate Pairing Mode on Your Headphones:
    • Ensure the headphones are charged.
    • Press and hold the power button on your WH-1000XM4 for about 7 seconds until you hear “Bluetooth pairing” and the indicator flashes blue.
  3. Pair the Headphones with Your Laptop:
    • On Windows: Click “Add Bluetooth or other device” and select “Bluetooth.” Choose “WH-1000XM4” from the list.
    • On macOS: In Bluetooth settings, find and select “WH-1000XM4” from the list of available devices.
  4. Complete the Pairing Process:
    • Follow any additional prompts to finish pairing.
    • Once connected, your headphones should be ready to use.

Refer to the user manual if you encounter any issues.

How do I put my Sony WH-1000XM4 in pairing mode?

To put your Sony WH-1000XM4 headphones in pairing mode, follow these steps:

  1. Power Off the Headphones:
    • Ensure the headphones are turned off. If they are on, press and hold the power button until you hear the power-down sound.
  2. Activate Pairing Mode:
    • Press and hold the power button for about 7 seconds.
    • You will hear a voice prompt saying “Bluetooth pairing” and see the indicator light start flashing blue.
  3. Confirm Pairing Mode:
    • The headphones are now in pairing mode and ready to be discovered by your device.

This process works for both initial pairing and pairing with a new device.

If the headphones are already connected to another device, you may need to disconnect or turn off Bluetooth on that device to initiate pairing mode again.

How do I put my Sony headphones in pairing mode?

To put your Sony headphones in pairing mode, follow these general steps (specific models might vary slightly):

  1. Turn Off the Headphones:
    • Ensure your headphones are off. If they are on, press and hold the power button until they turn off.
  2. Activate Pairing Mode:
    • Press and hold the power button for about 7 seconds. For some models, you may need to hold a dedicated pairing button instead.
    • Wait until you hear a voice prompt saying “Bluetooth pairing” and see the indicator light start flashing (usually blue).
  3. Confirm Pairing Mode:
    • The headphones are now in pairing mode and can be discovered by your device.

If your model has different instructions, refer to the user manual for specific details. Generally, this method works for most Sony wireless headphones, including popular models like the WH-1000XM series.

How to connect sony headphones to laptop?

To connect Sony headphones to your laptop, follow these steps:
  1. Turn on Bluetooth on Your Laptop:
    • On Windows: Go to Settings > Devices > Bluetooth & other devices, and enable Bluetooth.
    • On macOS: Go to System Preferences > Bluetooth, and turn it on.
  2. Put Your Headphones in Pairing Mode:
    • Ensure the headphones are off.
    • Press and hold the power button for about 7 seconds until the indicator light starts flashing blue and you hear “Bluetooth pairing.”
  3. Pair the Headphones with Your Laptop:
    • On Windows: Click “Add Bluetooth or other device” and select “Bluetooth.” Choose your Sony headphones from the list.
    • On macOS: In Bluetooth settings, find and select your Sony headphones from the list of available devices.
  4. Complete the Pairing Process:
    • Follow any additional prompts to finish pairing.
    • Once connected, your headphones should be ready to use.

Refer to the user manual if you encounter any issues.

Here, how to clean beats headphones.

Things to know before connecting sony headphones to laptop

Before connecting your Sony headphones to your laptop, here are some key things to know:

How to connect sony headphones to laptop?

  1. Compatibility:
    • Ensure your laptop supports Bluetooth. Most modern laptops do, but older models may require a Bluetooth adapter.
  2. Battery Charge:
    • Ensure your Sony headphones are fully charged or have sufficient battery life to avoid disconnection during use.
  3. Bluetooth Version:
    • Check if your laptop’s Bluetooth version is compatible with your headphones for optimal performance.
  4. Software Updates:
    • Ensure your laptop’s operating system and Bluetooth drivers are up-to-date to prevent connectivity issues.
  5. Device Proximity:
    • Keep the headphones close to the laptop during the pairing process to ensure a stable connection.
  6. Interference:
    • Minimize interference from other Bluetooth devices and Wi-Fi networks which can affect connectivity.
  7. Resetting:
    • If previously paired devices cause issues, reset the headphones to clear old connections.

Understanding these points will help ensure a smooth and efficient pairing process.

9 ways to connect sony headphones to laptop

Connecting Sony headphones to a laptop can be accomplished through various methods, depending on the model and the laptop’s capabilities.

Here are nine ways to connect your Sony headphones to a laptop:

Here, how to connect beats by dre wireless headphones.

1. Bluetooth Pairing

Bluetooth pairing is the most common and convenient way to connect wireless Sony headphones to your laptop. Ensure Bluetooth is enabled on both the laptop and headphones.

Put the headphones in pairing mode by holding the power button for about 7 seconds until the indicator light flashes blue.

On your laptop, navigate to the Bluetooth settings, find your headphones in the list of available devices, and select them to pair.

2. Using a USB Adapter

If your laptop lacks built-in Bluetooth, a USB Bluetooth adapter can be used.

Plug the adapter into a USB port on your laptop and install any necessary drivers. Once installed, turn on Bluetooth on your laptop via the adapter’s software.

Put your headphones in pairing mode, and pair them with your laptop through the Bluetooth settings.

3. Wired Connection with an Audio Cable

For models that support it, a wired connection can be used.

Plug one end of a 3.5mm audio cable into the headphone jack on your laptop and the other end into the port on your headphones. This method is useful when you want to save battery or when Bluetooth is not available.

4. Using a Bluetooth Dongle

A Bluetooth dongle can be used for laptops without Bluetooth or with outdated Bluetooth versions. Insert the dongle into a USB port, and install any required drivers.

Activate Bluetooth on the dongle, put your headphones in pairing mode, and pair them via the Bluetooth settings on your laptop.

5. Pairing via NFC (Near Field Communication)

Some Sony headphones support NFC for quick pairing.

If your laptop also supports NFC, enable NFC on both devices. Simply tap your headphones to the NFC detection area on your laptop. This should trigger the pairing process automatically.

6. Using a USB-C to 3.5mm Adapter

For laptops without a 3.5mm audio jack, a USB-C to 3.5mm adapter can be used.

Connect the adapter to a USB-C port on your laptop, then plug a 3.5mm audio cable from the adapter to your headphones.

7. Connecting through an Audio Interface

An audio interface can be used for high-quality wired connections.

Connect the audio interface to your laptop via USB. Plug your headphones into the audio interface’s headphone output. This method is beneficial for professional audio work requiring high-fidelity sound.

8. Using the Sony Headphones Connect App

For specific Sony headphone models, the Sony Headphones Connect app can help manage connections. Install the app on your laptop if available.

Use it to manage Bluetooth connections and update firmware. This can enhance connectivity and provide additional features.

9. Connecting via a Bluetooth Transmitter

A Bluetooth transmitter can be used if your laptop doesn’t support Bluetooth. Connect the transmitter to your laptop’s headphone jack or USB port.

Put your headphones in pairing mode, then pair them with the transmitter. This is useful for older laptops without Bluetooth capabilities.

Each of these methods provides a unique way to connect your Sony headphones to your laptop, catering to different needs and hardware configurations.

Ensure to check compatibility and follow the specific instructions for your headphones and laptop model.

5 methods to connect sony headphones to laptop

Connecting Sony headphones to a laptop can be achieved in several ways, depending on the features of your headphones and the laptop’s capabilities.

Here are five methods to connect your Sony headphones to your laptop:

Here, how to connect bluethooth headphones to xbox series x.

1. Bluetooth Pairing

Bluetooth pairing is the most common and convenient method to connect Sony wireless headphones to a laptop. Here’s how to do it:

  • Enable Bluetooth on Your Laptop: On a Windows laptop, go to Settings > Devices > Bluetooth & other devices and toggle Bluetooth on. On a MacBook, go to System Preferences > Bluetooth and turn it on.
  • Put Your Headphones in Pairing Mode: Ensure your headphones are off. Press and hold the power button for about 7 seconds until the indicator light starts flashing blue, signaling that the headphones are in pairing mode.
  • Pair with Your Laptop: On your laptop, click on “Add Bluetooth or other device” in the Bluetooth settings on Windows or select “Connect” on macOS. Choose your Sony headphones from the list of available devices. Follow any additional prompts to complete the pairing process.
  • Confirm the Connection: Once paired, your headphones should appear as connected in the Bluetooth settings, and you should be able to hear audio from your laptop through your headphones.

This method is effective for most modern Sony wireless headphones and laptops, offering convenience and a clutter-free setup.

2. Using a USB Bluetooth Adapter

If your laptop doesn’t have built-in Bluetooth or has an outdated version, using a USB Bluetooth adapter is a practical solution:

  • Purchase a USB Bluetooth Adapter: Ensure it is compatible with your laptop’s operating system.
  • Install Necessary Drivers: Plug the adapter into a USB port on your laptop. Most adapters come with a CD for driver installation, or you may need to download the drivers from the manufacturer’s website.
  • Enable Bluetooth via the Adapter: Once installed, enable Bluetooth through the adapter’s software interface.
  • Pair Your Headphones: Put your headphones in pairing mode. In the adapter’s Bluetooth settings, find and select your Sony headphones to pair them.
  • Complete the Connection: Follow any prompts to complete the connection process. Your headphones should now be connected and ready to use.

This method extends Bluetooth functionality to laptops that lack it or enhances it for better compatibility and range.

3. Wired Connection with an Audio Cable

A wired connection is reliable and straightforward, especially when Bluetooth isn’t available or preferred:

  • Check for a 3.5mm Audio Jack: Ensure your laptop has a 3.5mm headphone jack. Some modern laptops might not include this.
  • Use a 3.5mm Audio Cable: Plug one end of the cable into the headphone jack on your laptop and the other end into the audio input on your Sony headphones.
  • Automatic Connection: Most laptops will automatically recognize the headphones once plugged in. If not, you may need to select the headphones as the audio output device in your laptop’s sound settings.
  • Test the Connection: Play audio from your laptop to ensure it’s being transmitted through the headphones.

This method is highly dependable and eliminates concerns about battery life or connectivity issues.

4. Pairing via NFC (Near Field Communication)

Some Sony headphones come equipped with NFC technology, allowing for quick and easy pairing:

  • Ensure NFC Compatibility: Verify that both your headphones and laptop support NFC. Many modern smartphones and some laptops have NFC built-in.
  • Enable NFC on Both Devices: On your laptop, enable NFC in the settings. This can usually be found in the same area as the Bluetooth settings.
  • Activate Pairing Mode on Headphones: Your headphones should be on and in pairing mode. This is typically done by pressing and holding the power button until the indicator light flashes.
  • Tap to Pair: Tap your headphones to the NFC detection area on your laptop. This should automatically trigger the pairing process.
  • Confirm the Connection: Follow any on-screen instructions to complete the pairing. Your headphones should now be connected to your laptop.

NFC pairing is a quick and user-friendly method, though it requires both devices to support NFC.

5. Using a Bluetooth Transmitter

A Bluetooth transmitter can connect your Sony headphones to a laptop that doesn’t support Bluetooth:

  • Purchase a Bluetooth Transmitter: Choose a transmitter that supports your laptop’s output port (3.5mm jack, USB, etc.).
  • Connect the Transmitter: Plug the transmitter into the appropriate port on your laptop. If it’s a 3.5mm transmitter, plug it into the headphone jack. For USB transmitters, plug them into a USB port.
  • Activate the Transmitter: Turn on the transmitter according to the manufacturer’s instructions.
  • Pair Your Headphones: Put your headphones in pairing mode. The transmitter should automatically detect and pair with the headphones.
  • Verify the Connection: Ensure that the transmitter is transmitting audio from the laptop to your headphones by playing some audio.

This method is especially useful for older laptops or those with damaged Bluetooth functionality, providing a reliable wireless connection.

Each of these methods offers a different approach to connecting your Sony headphones to your laptop, catering to various needs and technical scenarios.

Here,

Related faq’s

How to connect sony wh-1000xm4 headphones to laptop

To connect Sony WH-1000XM4 headphones to your laptop, follow these steps:

  1. Enable Bluetooth on Your Laptop:
    • On Windows: Go to Settings > Devices > Bluetooth & other devices, and turn on Bluetooth.
    • On macOS: Go to System Preferences > Bluetooth, and enable Bluetooth.
  2. Activate Pairing Mode on Headphones:
    • Ensure the headphones are off.
    • Press and hold the power button for about 7 seconds until the indicator light flashes blue and you hear “Bluetooth pairing.”
  3. Pair the Headphones with Your Laptop:
    • On Windows: Click “Add Bluetooth or other device” and select “Bluetooth.” Choose “WH-1000XM4” from the list.
    • On macOS: In Bluetooth settings, find and select “WH-1000XM4” from the list of available devices.
  4. Complete the Connection:
    • Follow any additional prompts to finalize pairing.
    • Once connected, your headphones should appear in the list of connected devices and be ready to use.

Ensure the headphones are fully charged for uninterrupted use.

How to connect sony headphones to macbook

Certainly! To connect Sony headphones to a MacBook, follow these steps:

  1. Enable Bluetooth on Your MacBook:
    • Click on the Apple menu > System Preferences > Bluetooth.
    • Ensure Bluetooth is turned on.
  2. Activate Pairing Mode on the Headphones:
    • Power off your Sony headphones.
    • Press and hold the power button until you see the LED indicator flashing in pairing mode (usually a blue light).
  3. Pair the Headphones:
    • In the Bluetooth preferences on your MacBook, you should see your Sony headphones listed.
    • Click on your headphones’ name to start the pairing process.
  4. Complete the Connection:
    • Follow any on-screen instructions to confirm the pairing.
    • Once connected, you’ll see “Connected” next to your headphones in the Bluetooth preferences.
  5. Configure Audio Output (if necessary):
    • Go to the Apple menu > System Preferences > Sound.
    • Select your Sony headphones from the Output tab to route audio to them.

After completing these steps, your Sony headphones should be successfully connected to your MacBook, allowing you to enjoy audio playback wirelessly.

How to connect sony wh-ch520 to laptop

To connect Sony WH-CH520 headphones to a laptop, follow these steps:

  1. Enable Bluetooth on Your Laptop:
    • On Windows: Go to Settings > Devices > Bluetooth & other devices, and turn on Bluetooth.
    • On macOS: Go to System Preferences > Bluetooth, and enable Bluetooth.
  2. Activate Pairing Mode on the Headphones:
    • Ensure the headphones are off.
    • Press and hold the power button until the LED indicator flashes in pairing mode (usually a flashing blue light or a combination of colors).
  3. Pair the Headphones:
    • On your laptop, open the Bluetooth settings.
    • Scan for Bluetooth devices and select “WH-CH520” from the list of available devices.
  4. Complete the Connection:
    • Follow any on-screen prompts to finalize the pairing process.
    • Once connected, your headphones should appear as connected in the Bluetooth settings, ready for audio playback from your laptop.

Ensure the headphones are charged for uninterrupted use during the pairing process.

How to connect sony wh-1000xm5 headphones to laptop

To connect Sony WH-1000XM5 headphones to your laptop, follow these steps:

  1. Enable Bluetooth on Your Laptop:
    • On Windows: Go to Settings > Devices > Bluetooth & other devices and toggle Bluetooth on.
    • On macOS: Go to System Preferences > Bluetooth and turn it on.
  2. Activate Pairing Mode on the Headphones:
    • Ensure the headphones are turned off.
    • Press and hold the power button until you hear “Bluetooth pairing” and the LED indicator flashes in pairing mode (usually a blue light).
  3. Pair the Headphones:
    • On your laptop, open the Bluetooth settings.
    • Scan for Bluetooth devices and select “WH-1000XM5” from the list of available devices.
  4. Complete the Connection:
    • Follow any on-screen instructions to complete the pairing process.
    • Once paired, your headphones should appear as connected in the Bluetooth settings, ready for audio playback from your laptop.

Ensure the headphones have sufficient battery for the pairing process.

How to put sony headphones in pairing mode

To put Sony headphones in pairing mode, follow these general steps:

  1. Turn Off the Headphones:
    • Ensure the headphones are turned off. If they are on, press and hold the power button until they turn off.
  2. Activate Pairing Mode:
    • For most Sony headphones, ensure they are off.
    • Press and hold the power button or the dedicated pairing button until you see the LED indicator flashing rapidly or hear a voice prompt indicating pairing mode (e.g., “Bluetooth pairing”).
  3. Check the Indicator:
    • Look for a flashing LED light (usually blue or red) or listen for audio cues that confirm the headphones are in pairing mode.
  4. Pair with a Device:
    • Once in pairing mode, navigate to the Bluetooth settings on your device (e.g., smartphone, laptop).
    • Scan for available Bluetooth devices and select your Sony headphones from the list to complete the pairing process.

Refer to your specific Sony headphone model’s manual for precise instructions, as the process may vary slightly depending on the model.

How to connect sony headphones to laptop windows 11

To connect Sony headphones to a laptop running Windows 11, follow these steps:

  1. Enable Bluetooth on Your Laptop:
    • Click on the Start menu, then Settings (gear icon) > Devices > Bluetooth & other devices.
    • Toggle Bluetooth on if it’s not already enabled.
  2. Activate Pairing Mode on the Headphones:
    • Ensure the headphones are turned off.
    • Press and hold the power button or the dedicated pairing button until you hear “Bluetooth pairing” or see the LED indicator flashing rapidly.
  3. Pair the Headphones:
    • In the Bluetooth settings on your laptop, click on “Add Bluetooth or other device” > Bluetooth.
    • Your Sony headphones should appear in the list of available devices. Click on them to start the pairing process.
  4. Complete the Connection:
    • Follow any on-screen prompts to finalize the pairing.
    • Once connected, your Sony headphones should show as connected in the Bluetooth settings, ready for use with audio output from your laptop.

How to connect sony headphones to laptop windows 10

To connect Sony headphones to a laptop running Windows 10, follow these steps:

  1. Enable Bluetooth on Your Laptop:
    • Click on the Start menu, then Settings (gear icon) > Devices > Bluetooth & other devices.
    • Toggle Bluetooth on if it’s not already enabled.
  2. Activate Pairing Mode on the Headphones:
    • Ensure the headphones are turned off.
    • Press and hold the power button or the dedicated pairing button until you hear “Bluetooth pairing” or see the LED indicator flashing rapidly.
  3. Pair the Headphones:
    • In the Bluetooth settings on your laptop, click on “Add Bluetooth or other device” > Bluetooth.
    • Your Sony headphones should appear in the list of available devices. Click on them to start the pairing process.
  4. Complete the Connection:
    • Follow any on-screen prompts to finalize the pairing.
    • Once connected, your Sony headphones should show as connected in the Bluetooth settings, ready for use with audio output from your laptop.

How to connect sony wh-ch720n headphones to laptop

To connect Sony WH-CH720N headphones to a laptop, follow these steps:

  1. Enable Bluetooth on Your Laptop:
    • Go to Settings > Devices > Bluetooth & other devices on Windows or System Preferences > Bluetooth on macOS.
    • Turn on Bluetooth if it’s not already enabled.
  2. Activate Pairing Mode on the Headphones:
    • Ensure the headphones are turned off.
    • Press and hold the power button until you hear “Bluetooth pairing” or see the LED indicator flashing rapidly.
  3. Pair the Headphones:
    • In the Bluetooth settings on your laptop, click on “Add Bluetooth or other device” on Windows or “Connect” on macOS.
    • Select Bluetooth and choose your Sony WH-CH720N headphones from the list of available devices.
  4. Complete the Connection:
    • Follow any on-screen instructions to finalize the pairing.
    • Once paired, your Sony headphones should be connected to your laptop and ready for use with audio playback.

Conclusion:

In conclusion, connecting Sony headphones to a laptop is a straightforward process that primarily involves enabling Bluetooth on the laptop, activating pairing mode on the headphones, pairing them via the Bluetooth settings, and finalizing the connection.

Whether using Windows or macOS, the steps generally remain the same. Ensuring both devices are within range during the pairing process and following any on-screen prompts ensures a successful connection.

Once connected, the Sony headphones can be used for audio playback from the laptop, providing a convenient and versatile listening experience.

Add a Comment

Your email address will not be published. Required fields are marked *