
How to Clean Headphone Pads?
Headphones are one of the most popular pieces of technology on the market.
Headphones are an essential part of our everyday lives, but like anything else, they can get dirty over time.
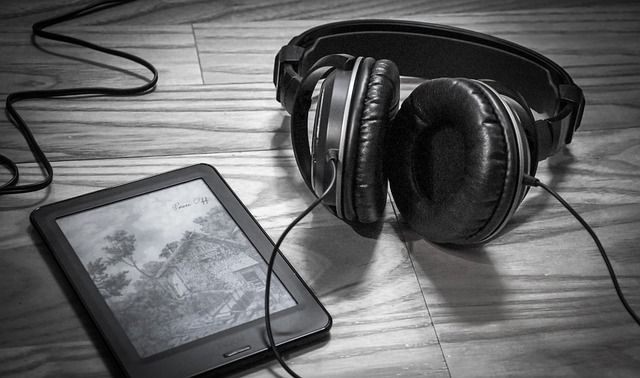
They offer an immersive listening experience, allowing users to focus on their music and away from the surrounding environment. However, like any other electronic device, headphones can accumulate dirt and dust over time.
In this guide, we’ll show you how to clean your headphones using different methods, as well as how to clean headphone pads and driver units, as well as give you advanced cleaning tips if needed.
So whether you’re hoping to keep your headphones sounding their best or just want to avoid any nasty surprises down the line, read on for a step-by-step guide!
Why do we need to clean our headphones?
Cleaning your headphones can extend their life and keep them looking new.
Your headphones will sound better and last longer if they’re regularly cleaned. Dirty headphone pads can create noise and decrease the quality of your audio experience.
In order to keep your headphones performing at their best, it’s important to regularly clean them. Here are some reasons why you should clean your headphone pads:
- Muffled Sound One of the most common problems with dirty headphone pads is muffled sound. Dirt and grime can block small air gaps that allow sound to travel freely through the headphones. This can dramatically reduce the quality of your audio experience.
- Poor performance in addition to muffled sound, dirty headphone pads can also cause poor performance. Over time, accumulation of dust, hair, and other debris can clog up the small openings in the headphone pad. This can severely impact the ability of the headphones to transmit sound properly.
- Extended LifeCleaning your headphone pads will help extend their life by reducing the chances of damage caused by dirt, dust, and other debris. If you take care of your audio equipment, you’ll be able to use it for longer periods of time without having to worry about it breaking down prematurely.
- Headphone pads can also attract dirt, dust, and other allergens that may cause irritation or breathing problems. Cleaning them regularly will help to remove these contaminants and keep your ears healthy.
As of now we have understood the importance of cleaning headphones. Now we will look forward to a step-by-step guide on how to clean headphones pads and the things you would need.
Getting Started
Let’s get into the cleaning process without any further delay.
We have listed some things you would need for clean headphones.
Stuff You Need to Keep the Headphones Clean
These are some things you would need for better understanding of how to clean headphone pads.
Here’s what you need:
- A small piece of cloth
- Rubbing alcohol or hand sanitizer
- Q-tips or cotton buds
- Detergent or Soap
- Warm Water
- blue-tack(glue)
- Multi-purpose adhesive
We will look forward to cleaning two types of headphones.
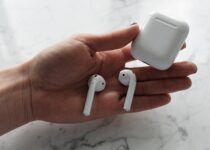
- Earphones: This includes earbuds and over-ear headphones.
- Headphones: this includes over-ear or on-ear headphones.
How to Clean Earphones
Keep reading and get ready to keep your headphones looking spick and span!

-
Cleaning the driver unit
Cleaning the driver unit on headphones is a simple process that can be done with a bit of patience and a little bit of cleaning supplies.
- To clean the headphone driver unit, use a soft toothbrush and a bit of liquid soap to loosen dirt or clogged ear wax. Tap the non-mesh side of the earbuds to clear some debris. Work the bristles around the edges of the unit and inside the ear cups.
- With a bent paperclip and some multipurpose adhesive, such as blu-tack or tack-it, go over the wire mesh and remove any remaining dirt and dust. The adhesive will pick up all the unwanted substances and leave your mesh debris-free.
- Take a small cloth and dampen it with rubbing alcohol or hand sanitizer. use damp cloth to clean the drivers and surrounding area. Wipe the metal mesh and wires with it.Use a dry cloth to finish off the cleaning.
-
Cleaning the ear tips
You can follow these two extra tips if you are Using silicone ear tips only. These two steps do not apply to foam ear tips or any other ear tips that are not water-resistant.
- Detach the silicone ear tips and soak the silicone ear tips in slightly soapy warm water for about 5 minutes,..
- Before reattaching the silicone sleeves, rinse them thoroughly, wipe them clean, and let them dry completely on paper towels.
2. How to Clean Headphones
Here are a few steps for a better understanding of how to clean headphones pads.
Take a look!
- You can remove the ear pads and start wiping the exterior of the headphones down with the help of a small cloth that is slightly wet with some warm water and soap. Then wipe them dry with some paper towels and let them air dry completely.
- To clean the nooks and crevices of the ear pads, soak a Q-tip or cotton bud in rubbing alcohol/hand sanitizer and wipe down the exterior with the help of the dampened cloth.
- Use a bit of alcohol or hand sanitizer to rub the right and left sides of the foam mesh together which will help kill the bacteria that are found in the ear pads as well as dislodge dirt and grime.
- Reattach the ear pads after they have dried completely on some paper towels.
3. Advanced Cleaning Method
There is this advanced method for you if you are looking for factory cleanliness..A more hardcore option is necessary for properly cleaning your headphones.
We recommend getting a hearing aid vacuum. A hearing aid vacuum, as the name implies, is a vacuum system for hearing aids. It efficiently removes earwax and dirt by utilizing small vacuum pumps.
Bonus Section:
1) How to clean headphone jacks
Clean out your headphone jacks as well. You don’t want to go through all that hard work only to discover that the jacks aren’t providing the best fit.
Consider the iPhone’s headphone jack as an example. Since the headphone jack’s interior is white, the dirt that accumulates there is painfully apparent.
Using compressed air can is the easiest and quickest way. The thin nozzle concentrates a quick short blast of air that will remove and dislodge the trapped lint and dust.
However, if you want to MacGyver it, you can also use different things like an interdental brush, a pipe cleaner, or a bent paper clip with double-sided tape. Be very careful while inserting and keep brushing the jack’s inside until all visible blockage is removed.
You need to make sure to be proceeding very carefully and gently because If you are too rough with the headphone jack, you may damage its metal interior.
2) Getting rid of the “sweat” stink
Solution 1: Silica gel packets
Do you know that funky odor from your headphones? Whenever you wear headphones for an extended period of time, moisture and dirt can stain the ear pads.
This can get really bad if you stay in a humid and damp environment. The cause of the awful odor is When moisture is present for a long period of time, mold grows and the awful odor develops.
In the packaging of food and electronics, you’ll find these gel packets. These tiny gel beads will absorb the moisture very well which will help control the humidity.
You can mitigate the stinky problem by placing them in your ear cups before putting away your headphones.
Solution 2: Get an ear pads replacement
If you are too late to follow this tip then By buying earpads replacement, it will completely fix the problem. If the original manufacturer’s earpad replacement is too expensive, then you can find plenty of third-party replacements on Amazon.

3) Keeping your ears clean
For optimal listening, you should keep your ears as well as your headphones clean. Ear wax is a waxy oil produced by the ear canal to protect the ear from foreign particles.
In case your ear canal produces too much oil, ear wax builds up. Here’s more information about ear wax buildup.
Debrox is a safe and popular way to remove ear wax. By using microfoam action and an active ingredient clinically proven to remove ear wax, Debrox removes ear wax from the ear canal effectively.
If you use cotton swabs or “Q-tips” to remove ear wax, you are actually pushing it inward and causing more blockage.
Here take a look at why cool kids are wearing wired headphones.
Frequently Asked Questions
How to keep my earpads clean from oily skin?
Antiperspirants work by blocking sweat from entering the pores and then evaporating. This leaves an oil residue on the skin which can be difficult to remove.
To clean your earpads, soak them in some freshwater for about 10 minutes, then scrub with a toothbrush until the pads are clean.
How to clean your headphones pads?
Headphone pads are often made of non-absorbent materials like rubber, plastic or EVA foam.
To clean them, simply wipe them dry with a clean cloth or a microfiber cloth. If the headphones pad is made of cloth, it is best to hand wash it in cold water and mild soap. Hang it to dry.
Headphone pads are easy to clean- simply use a damp cloth to clean them. Do not use harsh detergents or cleaners as this could damage the pad.
Can you wash the headphone pads?
Yes, you can wash your headphone pads. Just Simply wet a soft washcloth with warm soapy water and wipe down your headphone pads. Carefully wipe your headphone pads. No need to scrub harder.
How often should I clean my headphone pads?
Depending on how often you use your headphones, once a week should be sufficient if you use your headphones on a regular basis. Always remember to dry the headphones pads properly after wiping them.
Can you use alcohol to clean headphone pads?
If you want to clean your earphones, mix a little water with isopropyl alcohol or you can also use mild dish detergent and start wiping the headphone pads with the solution gently with a clean cloth, cotton swab, or you can even use a soft toothbrush.
Can hand sanitizer clean headphones?
Some hand sanitizer might clean headphones, but vodka or rubbing alcohol should do a better job. If you don’t have alcohol or any of these products you can simply use hand sanitizer.
Clean the earbuds with a cloth and then pour some vodka or hand sanitizer on it and gently rub it around the earbuds.
How to clean headphones foam pads?
It’s important to keep your headphones clean, especially if you’re sharing them with others. Here’s how to clean the foam pads on your headphones:
- Begin by removing the foam pads from the headphones. If they’re glued on, you can use a blunt knife or your fingernails to carefully pry them off.
- Once the foam pads are off, you can gently wash them with soap and water. Be sure to rinse them well afterward so that there’s no soap residue left behind.
- If the foam pads are very dirty, you may need to soak them in a mixture of warm water and vinegar for a few minutes before washing them.
- Once the foam pads are clean, allow them to air dry completely before putting them back on the headphones.
How to clean headphones headband?
If your headphones are starting to look a little bit dirty, don’t worry – it’s easy to clean them!
First, start by taking a look at the headband. If there is any dirt or grime build-up, you can use a soft cloth to wipe it away. If the headband is made of leather, be sure to use a mild leather cleaner so you don’t damage the material.
Next, take a look at the ear cups. If they are made of fabric, you can spot-clean them with a damp cloth. Be sure to use gentle pressure and avoid scrubbing too hard, as this could damage the fabric.
If your ear cups are made of plastic or metal, you can gently wipe them down with a damp cloth as well. Again, be careful not to scrub too hard so you don’t scratch or damage the surface.
Finally, take a look at the audio jack and any other small crevices on your headphones. You can use a cotton swab dipped in rubbing alcohol to clean these areas. just be sure not to insert the cotton swab too far into the headphone port so you don’t damage anything inside.
That’s it! With just a few simple steps, you can easily clean your dirty headphones and make them look good as new!
How to clean headphones’ leather pads?
If your headphones’ leather pads are starting to look a little dirty, don’t worry – it’s easy to clean them! All you need is a soft cloth and some mild soap.
Start by gently wiping the pads with the cloth. If there are any stubborn marks, you can use a bit of soap on the cloth to help break them up.
Once the pads are clean, rinse them off with water and dry them completely before putting your headphones back on.
And that’s all there is to it! With just a few simple steps, you can keep your headphones looking and feeling great.
Conclusion
If you’re like most people, your headphones are a constant part of your daily routine. But just like any other electronic device, they need to be taken care of if you want them to last.
Headphone pads can get dirty really easily, especially if you use them a lot. In this article, we have shared tips on how to clean headphone pads the right way so that they stay clean and functioning for as long as possible.
By following our guide, you will be able to keep your headphones in great condition and free from any harmful build-up. Thanks for reading!

How To Use Lightning Headphones On Laptop?

Dropped AirPod in toilet?
Woow! Magnetic information