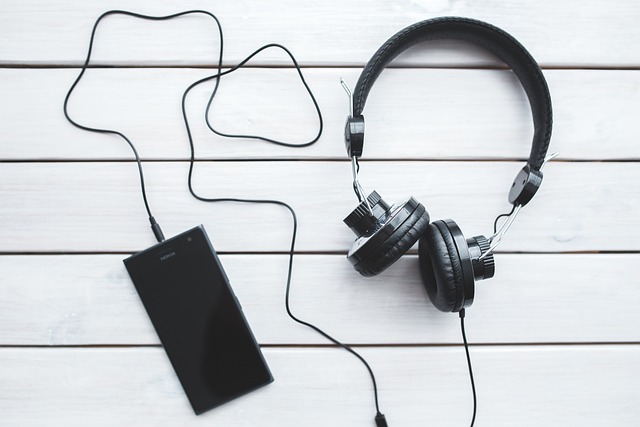
How to fix broken headphone wire?
Are you here just because your headphone wire has broken and now you don’t know what to do? You surely want to know how to fix broken headphone wires.
We’ve all been there. You’re jamming out to your favourite tunes when you suddenly notice that your headphone wire is fraying. Don’t worry, it’s an easy fix!
Nowadays, headphones are used for so many purposes throughout the day, there are a lot of chances that delicate wires will break.
But no need to worry because We are here to help and we have got your back covered.
Using headphones more often damages the thin covering of the wire which doesn’t look cool.
In this article, we will learn how to fix broken headphones wire with the help of DIY at home and we will also look at some other things.
Now without further delay let’s get started.
Are Exposed Headphone Wires Dangerous?
Are Exposed Headphone Wires Dangerous? The short answer is no, not really. If the wires are exposed, there is no danger of electrocution or fire.
While exposed headphone wires may not be the most aesthetically pleasing sight, they are not necessarily dangerous. However, if the wires are frayed or damaged in any way, it is important to repair them as soon as possible as they can pose a choking hazard.
When it comes to exposed headphone wires, there is no need to worry about any potential danger. The voltage passing through the wires is very low and not harmful in any way. Therefore, exposed headphone wires are not dangerous.
In other words, the current passing through your headphones is too weak to cause any serious harm. However, that doesn’t mean you should start exposing your headphone wires on purpose.
If the insulation on your wires is damaged, it could lead to a short circuit that could potentially damage your headphones or even cause a fire. Now we will lead to the solution on how to fix broken headphone wire?
How to Fix Headphone Wires That Are Beginning to Fray (3 hidden methods- Revealed
If you’re like most people, you’ve had a pair of headphones that you really liked but your pair of headphones has suddenly stopped working, chances are the issue is with the headphone wires.
Headphone wires are especially susceptible to damage because they are often moved around and bent. Over time, this can cause the wires to fray and eventually break.
If you notice your headphone wires beginning to fray and become damaged. Then you would also notice the static sound and some other common issues.
This can be really frustrating, but there are some things that you can do to fix the problem.
This is a little problem that could be solved with a little bit of your time and you don’t need any professionals for this.
These are a few methods we will be discussing in detail.
- Wrap it with electrical tape
- Use heat-shrink tubing
- Mould Sugru around it
- Use cable savers
Wrap it with electrical tape
The first method is simply using electrical tape to fix your headphones.
With just a little electrical tape, you can have your headphones working like new in no time.
Here’s what you’ll need:
Electrical tape
A sharp knife or scissors
Prep your wire.
First, take a close look at the area where the wire is fraying. Then prep the wire by cleaning it and removing any dirt or debris. If there are any sharp edges, use a knife or scissors to carefully trim them away. This will help prevent the electrical tape from getting damaged or pulled off.
Pre-cut your electrical tape.
Next, cut a piece of electrical tape that is slightly longer than the length of the frayed area or to the desired length
Wrap it.
Wrap it around the wire, making sure to cover the entire frayed section. Be sure to smooth out any bubbles or wrinkles in the tape for a neat and professional finish.
Your headphones should now have a layer of protection against further wear and tear.
That’s it! Your headphones are now good as new. You can now Enjoy your tunes!
Use heat-shrink tubing
The second best method for your fraying headphones is to use heat-shrink tubing. This will help to protect the wires and its long-lasting fix from fraying further.
Things you will need:
- Heat-shrink tubing
- A heat gun or lighter
Check the material.
First, check the material of your headphone wires. If they’re made of a brittle material, like most plastics, they may not be able to withstand the heat of the shrink tubing. In this case, you’ll need to replace the wires entirely.
Choose the right size.
Next, choose the right size of heat-shrink tubing. It should be slightly larger than the diameter of the headphone wires.
Those heat- shrink comes in different sizes. We recommend using a ratio 2:1 of the heat-shrink tube as they are perfectly strengthened and flexible.
Clean the area to be wrapped.
You’ll also want to clean the area where you’ll be applying the tubing. You can use a small piece of cloth to clean your headphones wire. This will help ensure that the tubing adheres properly.
Insert the headphone cable through the tubing.
Place the tubing over the damaged part of your headphone wire. For wrap heat shrink, hold it tightly to give your headphones a nice look.
Apply heat to the area.
Then, using a heat gun or lighter, carefully shrink the tubing down so that it’s snug around the wire. You can also use the heating device that comes with heat shrink.
Be careful not to overheat the tubing, as this can damage the wire.
Once the tubing is in place, your headphone wires should be protected from further damage.
Mould Sugru around it
Now for the next fix, you will need sugru mouldable glue. It can be used for many DIYs as it is flexible, waterproof as well a good insulator.
Here’s how to fix it using sugru mouldable glue and a little patience.
Clean the wire.
First, clean the wire. You don’t want any dirt or debris on the wire, or on the Sugru. Clean it with a small piece of cloth using a small amount of isopropyl alcohol.
Mould it.
Then, mold the Sugru around the broken wire. Make sure that the Sugru is tightly packed around the wire, and that it covers all of the bare metal areas. you’ll need to shape the Sugru around the wire. This will help hold the wire together and make it easier to repair.
Leave it for 24 hours
Leave the glue to dry for 24 hours. Now it will permanently be attached to your headphones. Once it’s dried, the wire should be fixed and no longer broken!
Use cable savers
Using cable savers is much easier to use if you want a quick fix. They will give your headphones support.
Choose the right cable-saver size.
There are a few different types of cable savers out there, so it’s important to choose the one that’s right for your needs. Some cable savers simply wrap around the wire and hold it in place, while others have hooks that can be attached to the earphones themselves. Choose the one that fits best for your headphone wire.
Wrap.
Now, wrap it around the wire of your headphones that are fraying.
Adjust it.
It’s also important to adjust the cable saver according to your headphone’s wire. Wrap it all around the headphone wire from upper to lower for saving the wire to get more damaged.
Note: these cable saver are best for round wires but not for flat ones.
These four methods on how to fix broken headphone wire might have helped you. If not, you can read more to fix your severely damaged headphones wires
What to Do With More Severely Damaged Headphone Wires
If the wires of your headphone are completely damaged and you are thinking that it might not be possible to reattach them. But that’s not the case because you can still fix them.
You can DIY at home but, you are not in a position to fix them yourself, you can also go to a professional if your headphones are still in warranty.

Because not properly following the DIY can be risky as it could make your headphones worse but if you are confident enough then let’s start.
However, there are a few ways to try and fix your headphones wires.
Repair with soldering
To solder wires, you’ll need:
- Electrical tape or heat-shrink
- Soldering kit
- wire strippers or cutter
- Lighter or sandpaper
Start stripping the wire.
Remove the insulation from the wires. If you see two wires stuck together, carefully separate the two using a knife or cutter.
Strip off the outer shielding by slowly running a wire stripper through it (1/4″ to 1/2″ cuts). You have to keep cutting carefully until the broken wire comes up. There will be coloured wire like red,blue, copper or green.
Cut the wire.
In case the wires inside are shredded and threads are showing, cut the headphone wire to make them more assembled and easy to approach.
Sand, the wires to expose the copper.
Now, you remove the thin covering of all the wires so that copper would be exposed. You can use either sandpaper or soldering iron. lighter would also work.
Twist together and solder.
Solder the wires together. you need to twist the wires then solder the connections. make a thin coat of solder on the wires by using your soldering iron.
Now, allow them to set and cool.
Wrap each wire carefully with electrical tape.
To prevent short circuits, wrap each wire carefully with electrical tape after the internal wires have cooled down. Make sure to wrap each wire carefully with electrical tape so that it does not short out against other parts of the cord.
Place and heat the heat-shrink tubing securely over the headphone cord.
Now it’s time for the last part which is securing the headphone cord by using a heat-shrink tube. Place the heat-shrink on the headphone cord and then hold it tightly to give it a clean look and then heat it.
If you are short of heat-shrink you can you electrical tape to secure your headphone cord.
How to fix headphone wires without soldering
Now if you are not in soldering and don’t want to do that. You can check this method on how to fix broken headphone wire without soldering.
Remove the rubber covering or sheath.
Use a wire stripper (or cutter) to remove the rubber covering of the wire to reveal the stripped wires. Do not cut through any wires.
Separate the wires by colour.
Color-code the wires. Twist together the colored wires (right headphone cable = red wires, left headphone cable = blue/green wires) and move them to one side. The ground wires (copper or gold wires) should also be separated by color. Repeat the process on the other side of the cable.
Melt off the thin enamel coating.
Use a lighter to melt off the enamel coating (to remove the colored varnish that covers the wires). You can also use sandpaper. also do the same on other cable side.
Blow the heat quickly on as Varnish burns easily, and overheating can melt the wire. heat the wire for only a second.
Isolate the wirings.
After splicing the coloured wires together, use electrical tape to isolate them from the ground wires.
Wrap it up.
Finally, you can wrap the wires up in either electrical tape or heat-shrink tubing.
Frequently Asked Questions
How do you fix a broken headphone wire without soldering?
The first step is to cut the AUX cable at a good distance from the connector.
- Remove the rubber covering or sheath
- Separate the wires by colour
- Melt off the thin enamel coating
- Isolate the wirings
- Wrap it up
We have mentioned the detailed process above in the article.
How do you fix a broken wired earphone?
If both wires are broken, you can connect them to one of the terminals on the circuit board. Heat the solder with your soldering iron to melt it and rescue the wire.
While working, you may find it helpful to use a table clamp or pair of pliers to hold the cord and earbud together.
Can headphone wires be repaired?
Well, it depends on whether the headphones are severely damaged or any simple issue.
But Yes, headphones wires can be repaired And you can also fix them at home with some simple tools.
Conclusion
We have completely guided you on how to fix the broken headphones wire.
Hopefully, this guide was helpful! Follow these given instructions carefully and always take care when working with wires as they can be dangerous if not handled properly.
Once you’ve fixed your wire, test it out by playing some music on your device and make sure everything is working properly.
If not, go back and fix whatever else needs fixing before moving on to the headphones themselves. Or you can get a pair of new headphones if nothing works.
Let us know in the comment section whether the article was helpful or not.
Thank you for taking the time to read out content.

Why won’t my AirPods charge?

How Bluetooth headphones work?